|
disclaimer:
|
| |
This How-To describes how to replace your hard drive on a Toshiba Satellite s1670cds and propably how to replace your hard drive in the complete 1600 series.
It comes without ANY WARRANTY. You cannot hold me responsible for screwing up your system.
Do everything at your own risk!
|
|
prearrangement:
|
| First of all.... slow down. It is very important to keep clam while the screwdriver is just a couple of milimetres away from some electronic circuits. Secondly get a good Philips screwdriver and a slotted screwdriver. I used my Leatherman which did not fit very good at all and so I smashed some screws. Thirdly get a clean and dry work space. Do not use your bed. I did it but I do not want to recommend it to you. And last but not least once more the hint: be careful!! Some people suggest to ground yourself before doing any stuff. Because it is for free I suggest it to you, too. Just touch your heating or anything like that. And do NOT shuffle along your new wool carpet on the way back to your work space ;-)
|
| step 1:
|
|
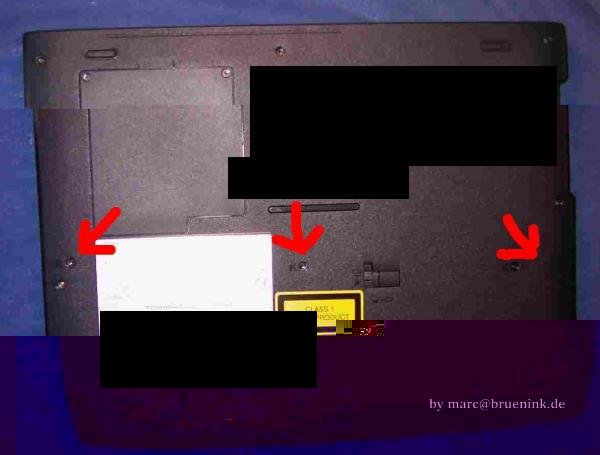
So draw your screwdriver and let's start!
First of all you have to remove the 3 screws on the back of your Toshiba Satellite marked with a "K"=keyboard.
|
| step 2:
|
|
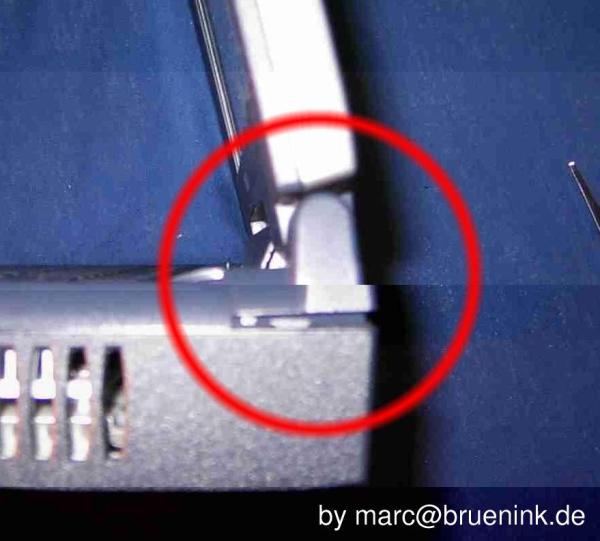
Now you have to lift the covering between keyboard and monitor.
Therefor apply the slotted screwdriver in the small gap between base and the covering and use it as a lever to lift the edge. Do this on both sides.
|
| step 3:
|
|
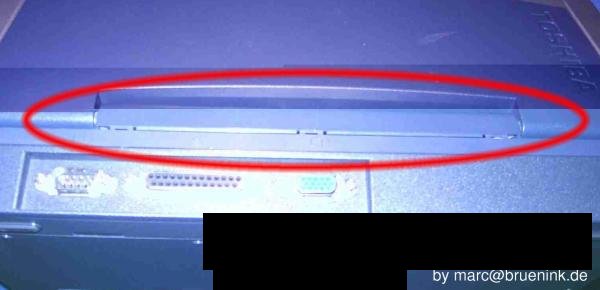
Turn the computer so that you are looking at the rear. Press the covering between the two hinges of the monitor and lift it.
|
| step 4:
|
|
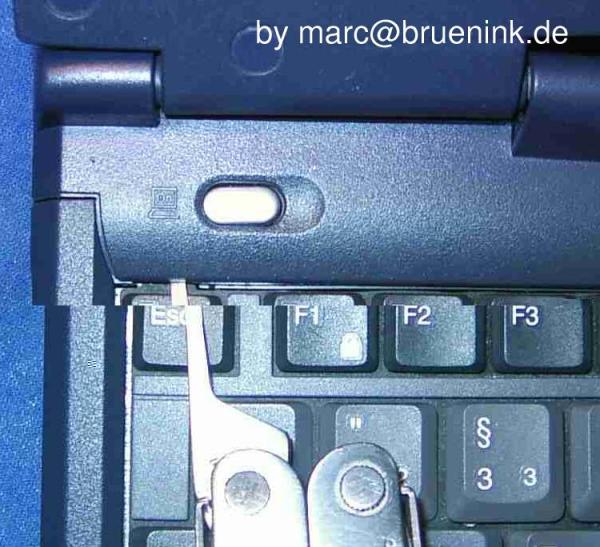
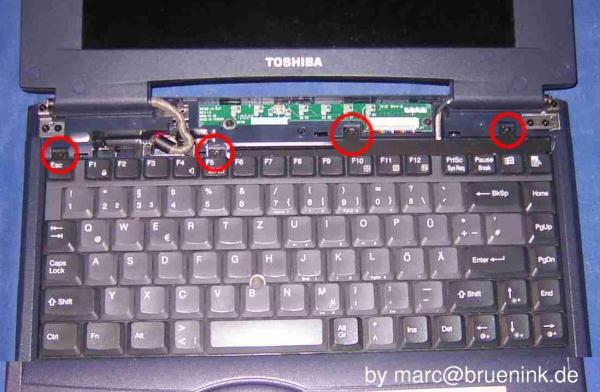
Turn you s1670cds once more. Apply your lever under the "Esc"-key. There is a small gap wich is perfectly for it. After the covering is lifted once more it is totally unmounted. So take it and put it aside.
|
| step 5:
|
|
Next you have to unmount the keyboard. Therefor remove the four screws fixing it.
|
| step 6:
|
|
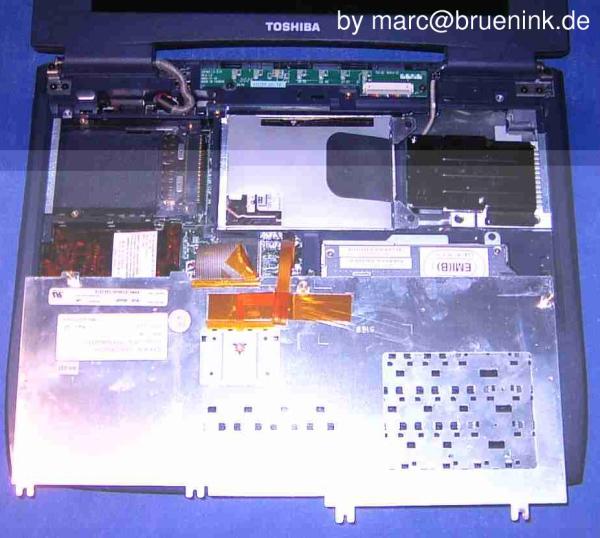
Now you can lift the keyboard and put it upside down on the laptop. Do not unplug the cables. That would be unnecessary work and increase the chance of damaging the unit.
|
| step 7:
|
|
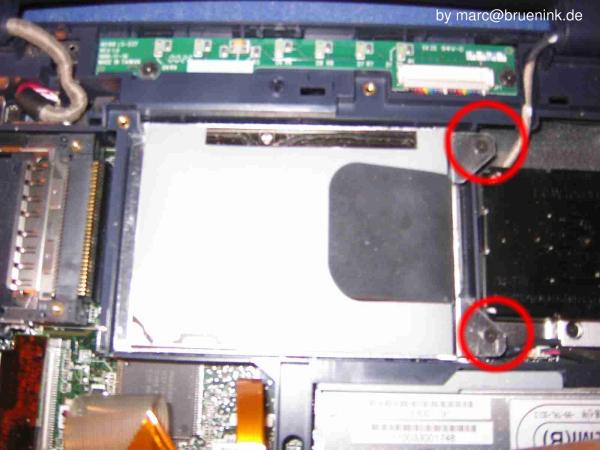
There it is. The hard drive. After removing the two screws you could unmount it by pulling it to the right and lift it.
|
| step 8:
|
|
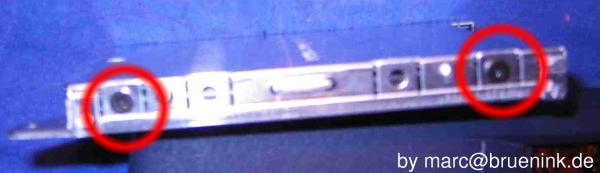
Last you have to remove the four screws fixing the hard drive with the mounting frame. Replace the hard drive and enjoy your day!
|
| step 9:
|
|
Send some feedback!
|